
> OSSCA Yorkie TIL(5) - 20분 만에 동시편집 Quill 에디터 구현하기
Crescent
0. 서론
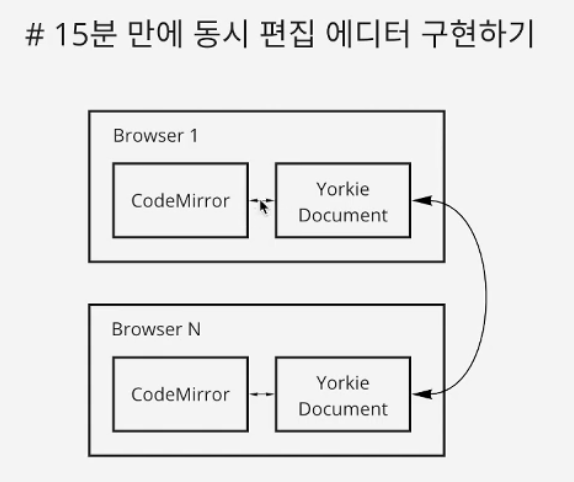
# 15분 만에 동시편집 에디터 구현하기(Youtube)
- OSSCA Yorkie TIL (2) - 15분 만에 동시편집 에디터 구현하기
- 저번에는
CodeMirror를 이용해 진행을 했다면,Quill에서도 간단하게 동시 편집 에디터 만드는 방법을 정리하고 싶었다. - 참고하기 좋은 문서: yorkie-js-sdk/examples/quill.html
Quill에는 글자 스타일, 사진 넣기와 같은 기능이 있지만, 영상 속CodeMirror에디터 처럼 텍스트 입력 기능만 진행하고자 합니다.
01. Quill 에디터 만들기
<!DOCTYPE html>
<html lang="ko">
<head>
	<meta charset="UTF-8" />
	<title></title>
	<script src="https://cdn.quilljs.com/1.3.6/quill.js"></script>
	<link href="https://cdn.quilljs.com/1.3.6/quill.snow.css" rel="stylesheet" />
</head>
<body>
	<div id="editor" style="height: 400px"></div>
	<script src="./main.js"></script>
</body>
</html>- 디렉토리에
index.html만들기 - https://quilljs.com/docs/download/ 들어가서
quill.js,quill.snow.css코드 복사quill.snow.css: 테마
<div>를<body>에 추가id="editor"
main.js만들어Quill에디터와 연결
console.log('hit');
const quill = new Quill('#editor', {
	modules: {
		toolbar: [],
	},
	placeholder: 'Compose an epic...',
	theme: 'snow',
});
index.html파일을 브라우저에 실행시키면(파일을 브라우저에 드래그 해도 됩니다.)- 잘 나온다!!
02. Yorkie Client, Document 생성
Yorkie JS SDK받고 서버 실행
git clone https://github.com/yorkie-team/yorkie-js-sdk.git- 클론!
docker-compose -f docker/docker-compose.yml up --build -dcompose를 이용해Docker를 띄움(Docker가 설치되어야 합니다.)- 문제가 생긴다면
docker container prune를 통해 중지된 컨테이너를 전부 삭제해서 실행할 수 있습니다.
- 문제가 생긴다면
- Yorkie가
DB도 사용하고 있고,grpc-web을 써서Envoy같은 것들이 뜰 수 있다고 한다.
Yorkie CDN추가
<!DOCTYPE html>
<html lang="ko">
<head>
	<meta charset="UTF-8" />
	<title></title>
	<!-- 여기 밑에다가 추가합시다 -->
	<script src="https://cdnjs.cloudflare.com/ajax/libs/yorkie-js-sdk/0.2.11/yorkie-js-sdk.js"></script>
</head>
<body>
	<div id="editor" style="height: 400px"></div>
	<script src="./main.js"></script>
</body>
</html>- Yorkie Client 생성, 활성화 & Yorkie Document 생성 & Text 생성
async function main() {
	console.log('hit');
	// 01. create an instance of Quill
	const quill = new Quill('#editor', {
		modules: {
			toolbar: [],
		},
		placeholder: 'Compose an epic...',
		theme: 'snow',
	});

	// 02. create client with RPCAddr(envoy) then activate it.
	const client = new yorkie.Client('http://localhost:8080');
	await client.activate();

	// 03. create a document then attach it into the client.
	const doc = new yorkie.Document('quill');
	await client.attach(doc);

	doc.update((root) => {
		if (!root.content) {
			root.content = new yorkie.RichText();
		}
	});
}
main();
new yorkie.Client()를 통해 클라이언트를 생성new yorkie.Document(key)를 생성,document는 적당한 이름인doc- 짝 맞춰
async와await을 - 이러면 Yorkie 쪽에 문서가 붙었기 때문에 클라이언트에 붙어서 만들어져야 한다.
RichText데이터 타입을 만들어Quill의 변경사항들이Yorkie에 저장될 수 있도록 한다.Quill은 Rich Text datacontent: key, 없을 때만 만들어 준다RichText데이터 타입을content라는 키로 만든다
03. Quill와 Yorkie 서로 연동(바인드)
- Quill와 Yorkie Document사이에서 바인드(bind) 되어 서로 주고 받아줘야 함
- 서로 주고 받으려면
Handler가 필요함Handler: 특정 유형의 데이터에 특화되어 있거나 특정 특수 작업에 초점을 맞춘 루틴/기능/태그
Document: 응용프로그램의 모델이 표현되는 CRDT 기반 데이터 유형. 클라이언트는 오프라인 상태에서도 편집할 수 있다.
Quill to Yorkie / Yorkie to Quill
- Quill to Yorkie: Quill의 변경사항이 Yorkie쪽으로 전달되게 하는 부분
- Yorkie to Quill: Yorkie쪽 변경 사항을 Quill로 반영되게 하는 부분
> PHASE 1
// doc.update((root) => {});

// (1) Quill
quill.on('text-change', (delta, oldDelta, source) => {
	console.log('Quill:', JSON.stringify(delta.ops));
});

// (2) Yorkie
doc.getRoot().content.text.onChanges((changes) => {
	console.log('Yorkie: ', JSON.stringify(changes));
});Quill쪽에서Handler를 추가한다.CodeMirror는change라면Quill은delta.opsdelta.ops를console.log로 찍어본다.JSON.stringfy()는 보기 쉬우라고 한 것
Yorkie쪽에서도Handler를 추가한다doc.getRoot().content에는text라는 항목이 존재Text쪽에서도changes를 받아 처리Text가 Yorkie Document쪽에content라는 이름이 있다.changes를console.log에 넣어 출력한다.
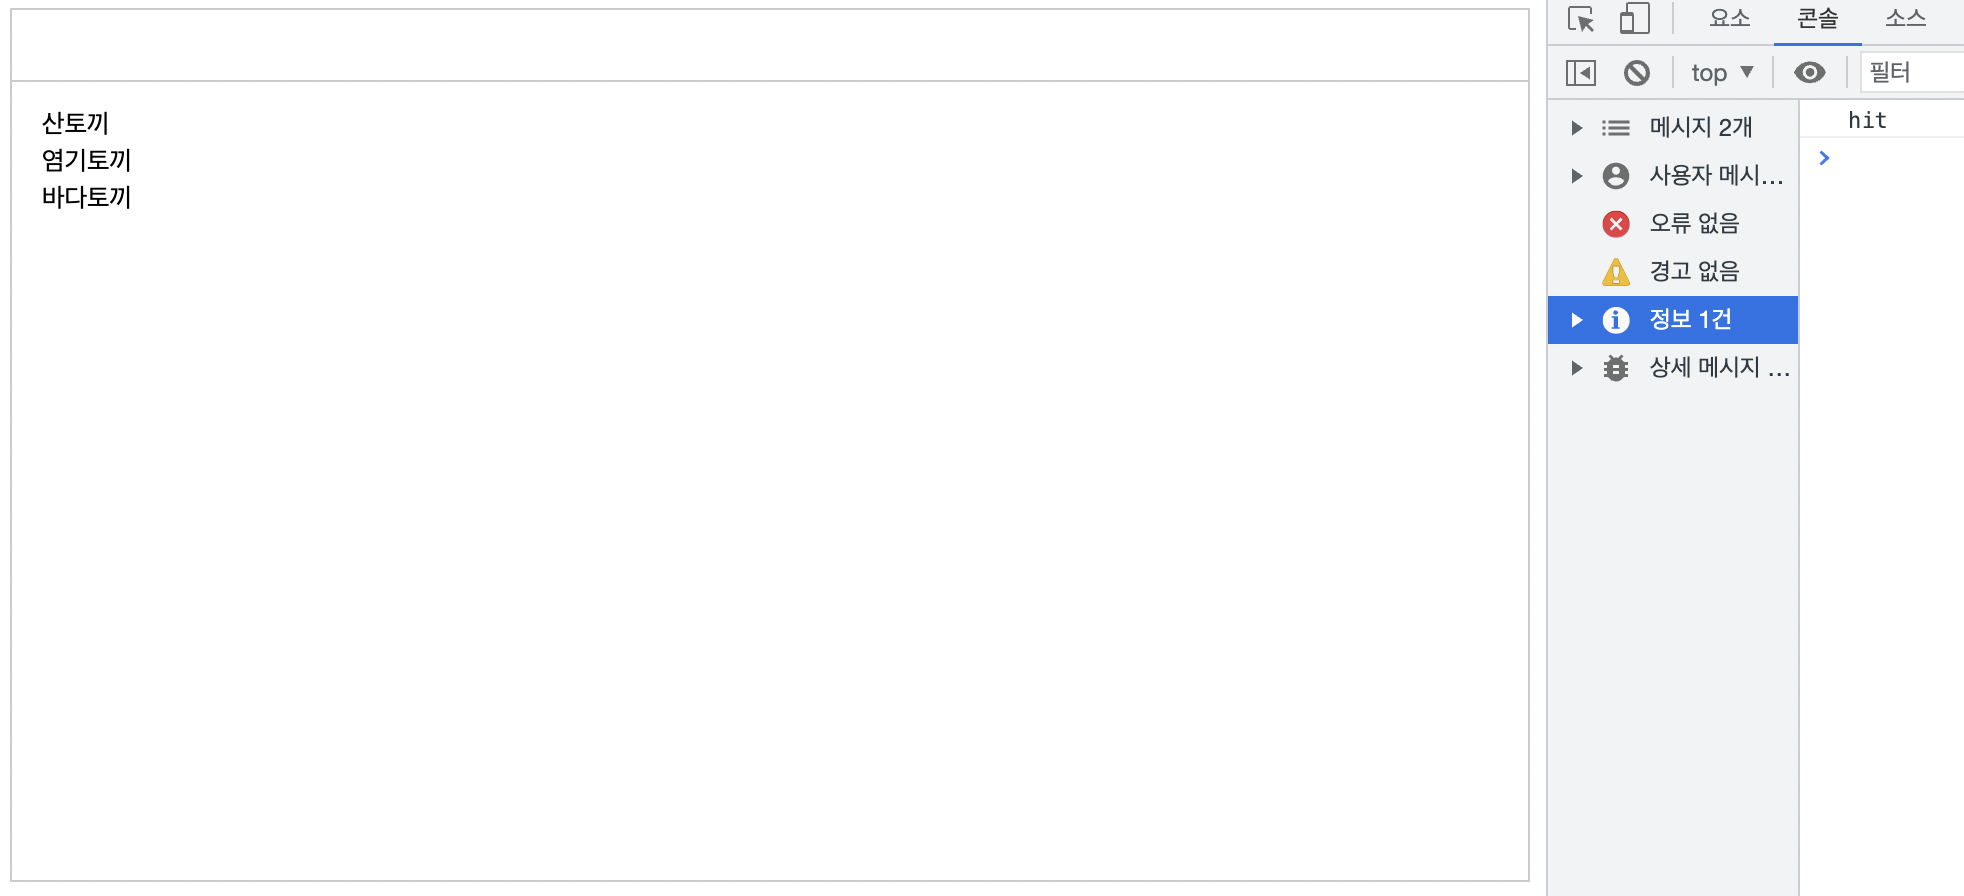
Handler가 제대로 붙었는지 확인하려면index.html파일 열어서 편집을 했을 때 콘솔이 찍히는지 확인한다- 콘솔에 잘 찍히면
Handler가 제대로 달린 것이다!
- 콘솔에 잘 찍히면
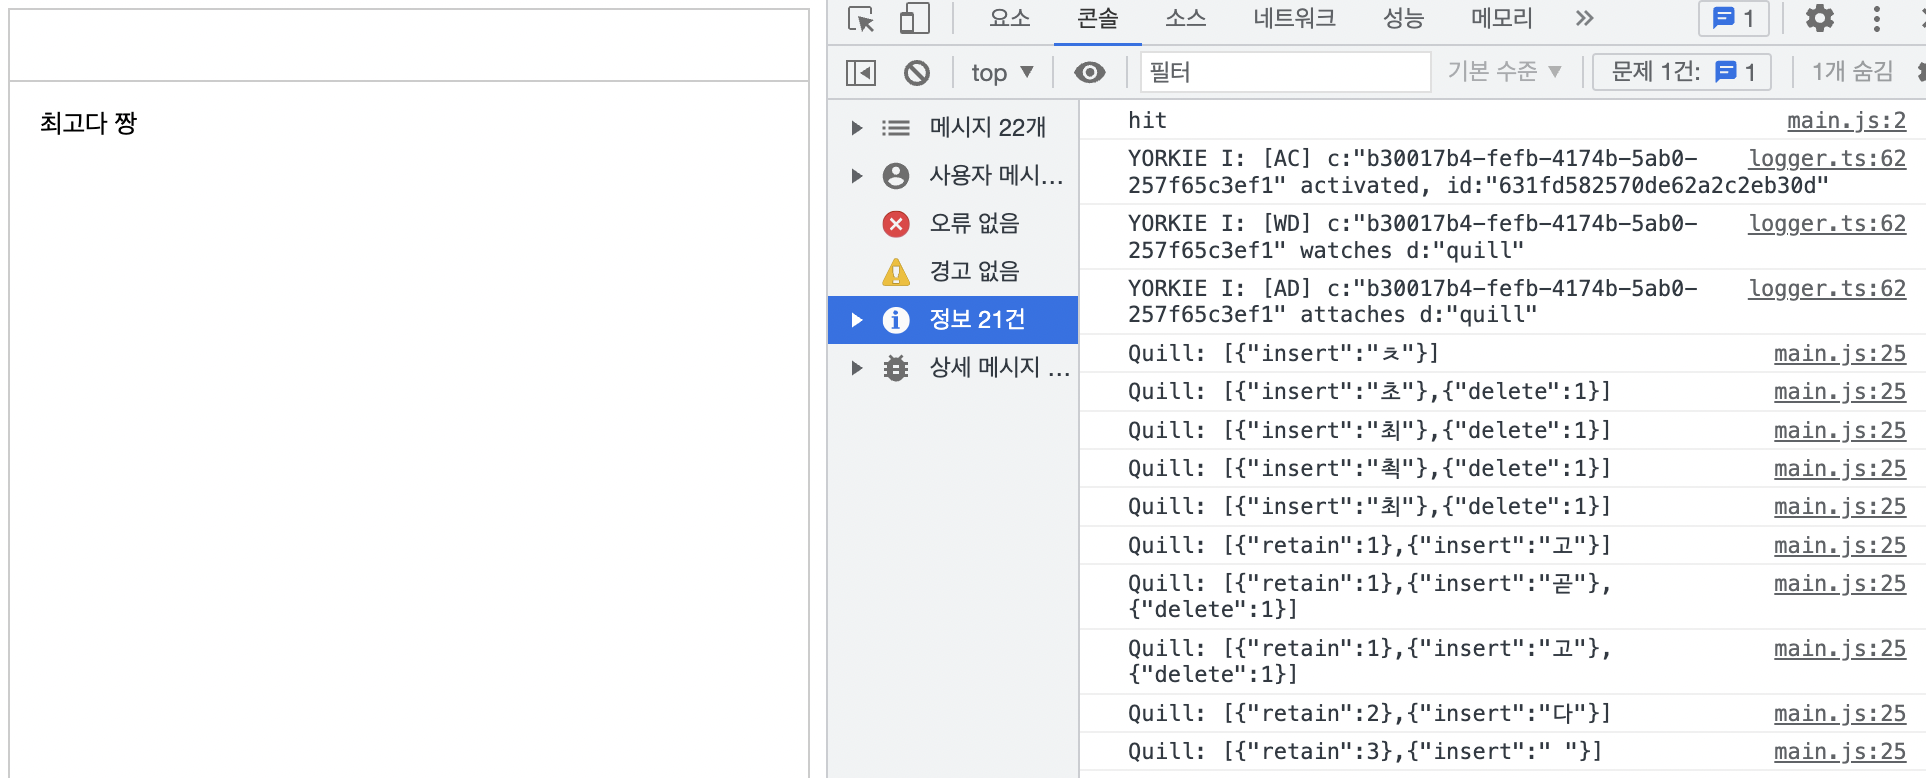
Quill쪽console.log가 나왔다.
> phase 2: Quill쪽부터 작업
// doc.update((root) => {})

// 04. bind the document with the Quill.
// 04-1. Quill to Document.
quill.on('text-change', (delta, oldDelta, source) => {
	if (source === 'yorkie' || !delta.ops) {
		return;
	}
	// (2)
	let from = 0;
	let to = 0;
	for (const op of delta.ops) {
		if (op.insert !== undefined) {
			// (2)
			if (op.retain !== undefined) {
				to = from + op.retain;
			}
			if (to < from) {
				to = from;
			}
			console.log(`%c insert: ${from}-${to}: ${op.insert}`, 'color: green');
			// (4)
			doc.update((root) => {
				root.content.edit(from, to, op.insert, op.attributes);
			});
			from = to + op.insert.length;
		} else if (op.delete !== undefined) {
			//  (2)
			to = from + op.delete;
			console.log(`%c delete: ${from}-${to}: ''`, 'color: red');
			// (4)
			doc.update((root) => {
				root.content.edit(from, to, '');
			});
		} else if (op.retain !== undefined) {
			// (2)
			from = to + op.retain;
			to = from;
		}
	}
});- 변경 사항이 없거나
Yorkie변경 사항과Quill변경 사항이 서로 핑퐁 될 수 있기 때문에 조건을 넣어야 한다.source === 'yorkie' || !delta.ops
Quill에서는to와from를 구해주는 것이 없기 때문에 직접 분기를 나누면서 진행해야 한다.insert/delete/retain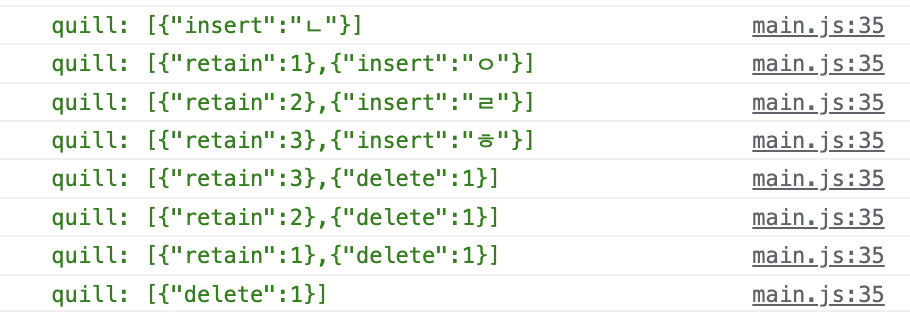
Quill에서는 들어오는 텍스드(op.insert)가string으로 들어오기 때문에 그냥 집어넣으면 된다.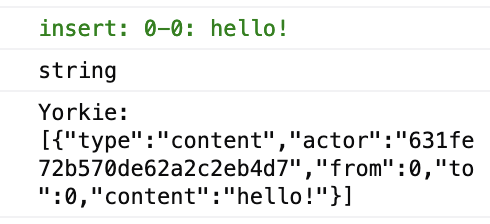
Yorkie Document를 업데이트root.content.edit호출
> phase 3: Yorkie to Quill 핸들러 구현
function toDelta(change) {
	const { embed, ...attributes } = change.attributes ?? {};

	const delta = embed
		? { insert: JSON.parse(embed), attributes }
		: {
		insert: change.content || '',
		attributes: change.attributes,
	};
	return delta;
}
// async function main() {main함수 위에 추가해야 한다.toDelta: 바뀐 부분(change)를insert와attributes로 고치는toDeltaList:
// 04-2. document to Quill(remote).
doc.getRoot().content.text.onChanges((changes) => {
	console.log('Yorkie: ', JSON.stringify(changes));
	// (1)
	const delta = [];
	let prevTo = 0;
	for (const change of changes) {
		// (2)
		if (change.type !== 'content' || change.actor === client.getID()) {
			continue;
		}
		// (3)
		const from = change.from;
		const to = change.to;
		const retainFrom = from - prevTo;
		const retainTo = to - from;
		// (4)
		const { insert, attributes } = toDelta(change);
		console.log(`%c remote: ${from}-${to}: ${insert}`, 'color:green');
		if (retainFrom) {
			delta.push({ retain: retainFrom });
		}
		if (retainTo) {
			delta.push({ delete: retainTo });
		}
		if (insert) {
			const op = { insert };
			if (attributes) {
				op.attributes = attributes;
			}
			delta.push(op);
		}
		prevTo = to;
	}
	// (4)
	if (delta.length) {
		console.log(`%c to quill: ${JSON.stringify(delta)}`, 'color: green');
		quill.updateContents(delta, 'yorkie');
	}
});changes가 배열로 오기 때문에 반복문을 만든다.- 반복문을 돌면서
to를 체크해야 하고, 내용과 변화를 설명하는 데이터인delta를 배열로 생성. - 사실 텍스트 입력만 다루는 상황에서는
attributes가undefined이긴 하다.
- 반복문을 돌면서
{ insert: 'Gandalf', attributes: { bold: true } },
{ insert: ' the ' },
{ insert: 'Grey', attributes: { color: '#cccccc' } }- 자신의 편집을 반영할 필요는 없으니 본인을 필터하고 컨텐츠 변경이 아닌 경우 필터링한다
Quill에서는content.type가 다양하게 있으나,content.type === 'content'일 때(텍스트 편집)만 다룬다.
- 변경사항을 나타내는
delta가 비어있지 않은 경우 그delta를quill에 집어넣는다.quill.updatecontents()사용
> phase 4: 새로고침을 했는데 반영이 안됩니다.
function toDeltaList(doc) {
	const obj = doc.getRoot();
	const deltas = [];
	for (const val of obj.content.values()) {
		deltas.push(toDelta(val));
	}
	return deltas;
}
// async function main() {Document를delta list로 바꿔주는 함수를 위에다가 추가한다.
// doc.getRoot().content.text.onChanges((changes) => {});

// 05. synchronize text of document and Quill.
quill.setContents(
	{
		ops: toDeltaList(doc),
	},
	'yorkie',
);Quill에디터에Yorkie Document를 집어넣는다.
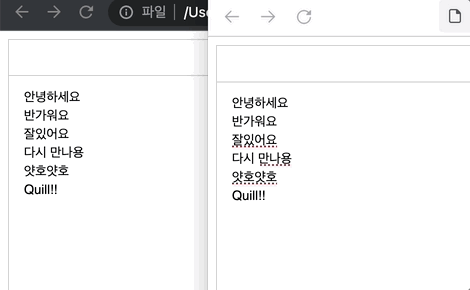
- 잘 된다 얏호!